Install & Activation Guide
This guide will help you activate your purchased or trial software from Scalp Radar.
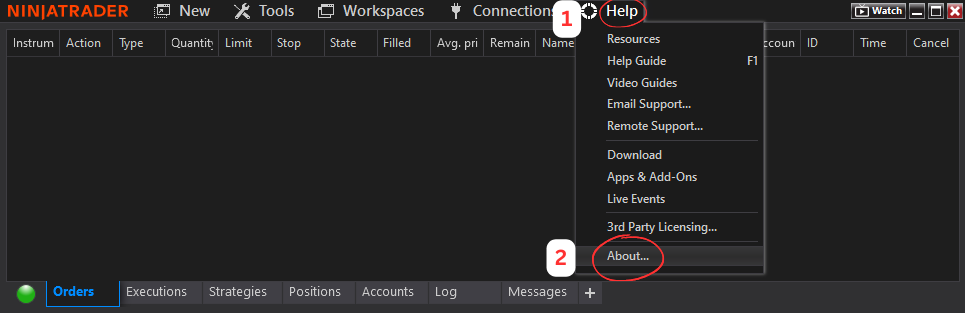
Step 1: Get Your Machine ID from NinjaTrader
Download and install the Scalp Radar Manager and your purchased indicator from the Downloads page. Details on how to install 3rd party addons can be found here.
Open NinjaTrader and navigate to Control Center > Help > About. Copy your Machine ID, as you'll need it to activate your license.
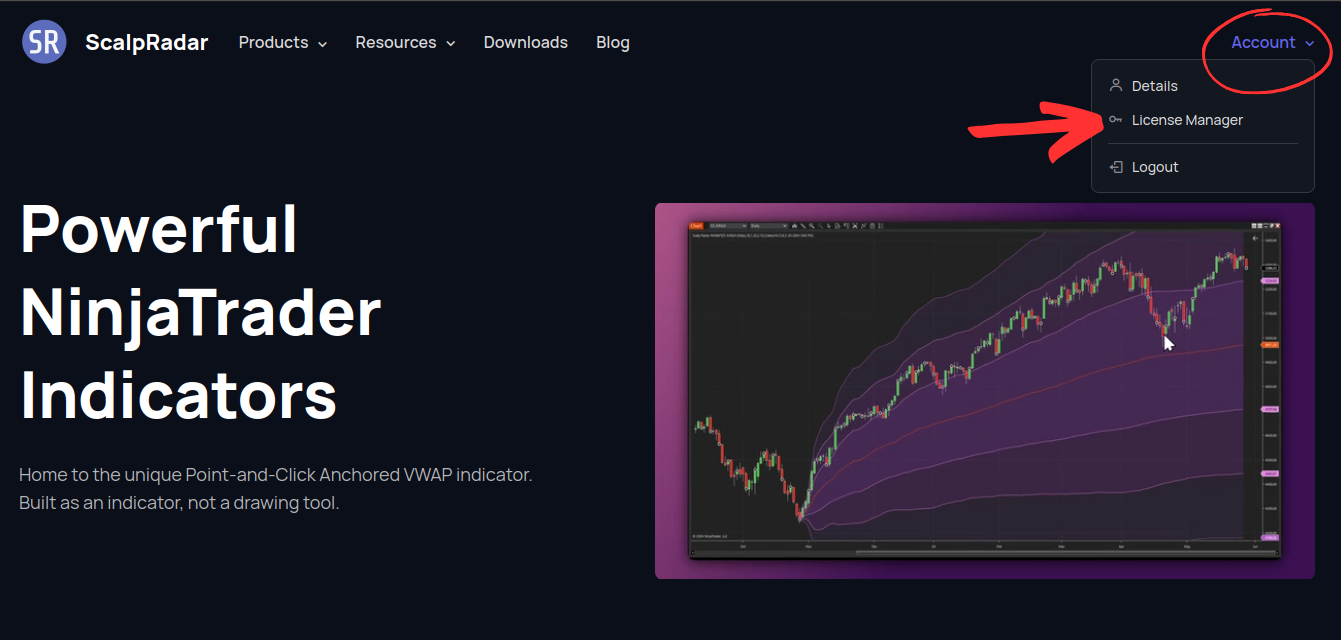
Step 2: Open the License Manager from the Website
Go to the Scalp Radar website, log in, and open the License Manager under the Account menu.
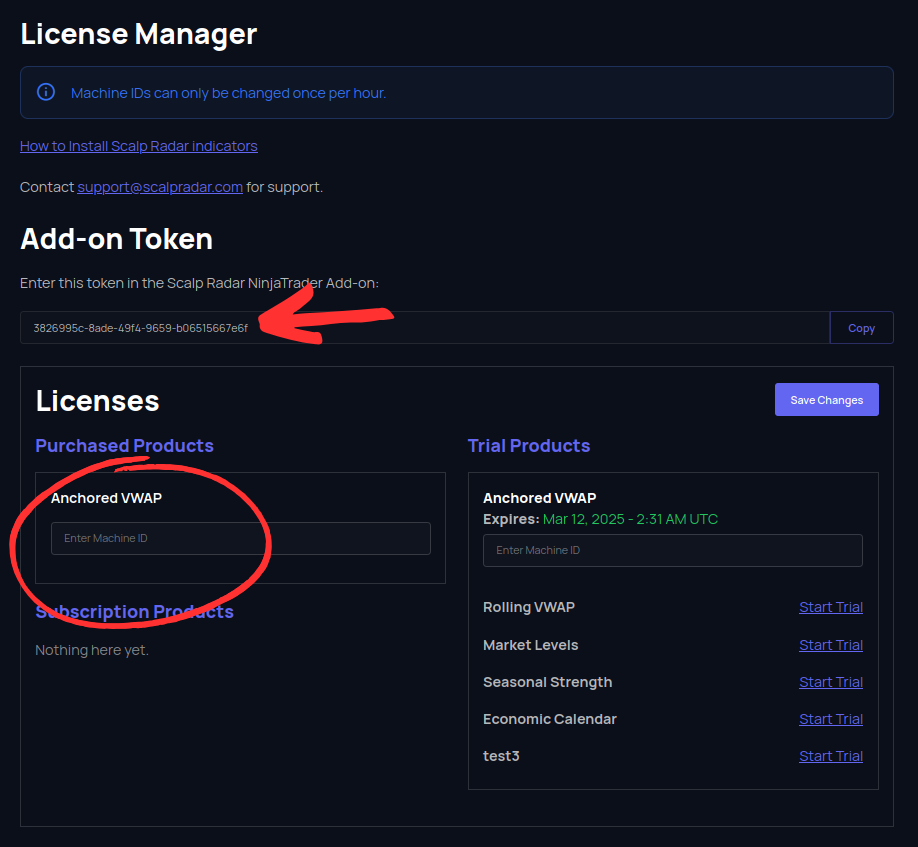
Step 3: Enter Your Machine ID in the License Manager
Once inside the License Manager, enter your Machine ID into the field next to the product you want to activate.
Note: Each Machine ID can only be changed once per hour.
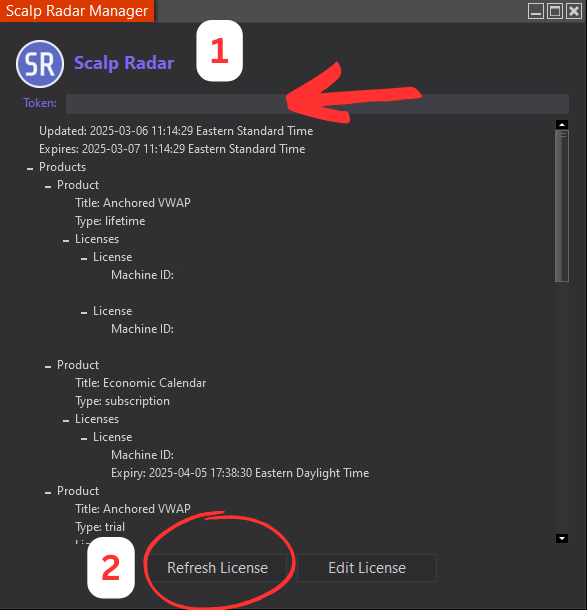
Step 4: Copy Your Token & Refresh License
Copy your token from the License Manager and enter it into the Scalp Radar Manager in NinjaTrader.
Go to Control Center > New > Scalp Radar Manager, paste the token, and click Refresh License.
Step 5: Install the Indicator
Open the NinjaTrader Control Center window and navigate to Tools > Import > NinjaScript Add-On.
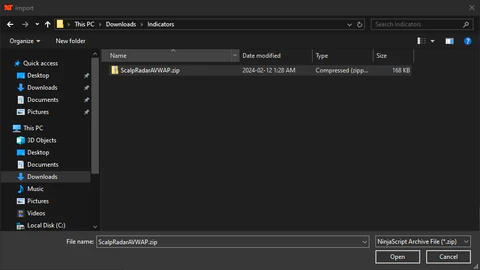
Step 6: Select the Indicator File
Find the indicator .zip file you downloaded to your computer. Do not unzip it.
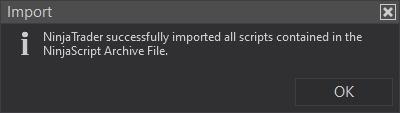
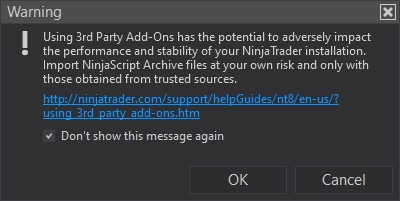
Step 7: Accept the Warning & Complete Installation
Click OK when prompted about third-party add-ons. After a few seconds, NinjaTrader will confirm a successful import.
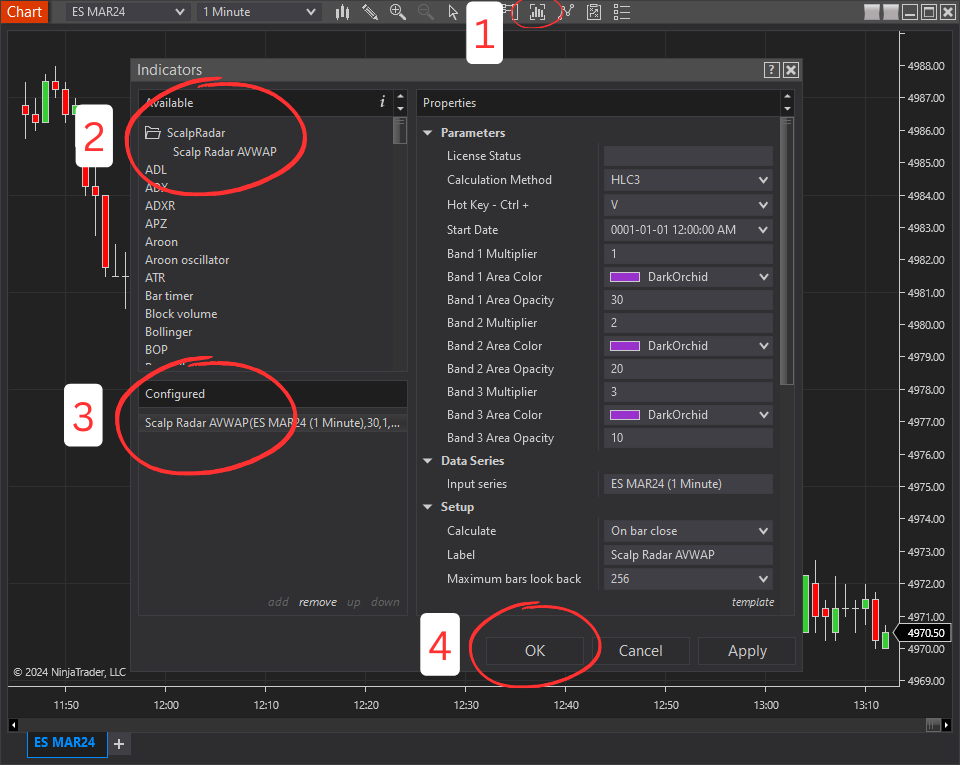
Step 8: Add the Indicator to a Chart
To use the indicator, open a chart and follow these steps:
- Click the Indicator icon or press
Ctrl + I - Find the Scalp Radar folder and double-click the indicator to add it.
- Select the indicator in the Configure window and customize the parameters.
- Save your changes by clicking OK.
Step 9: Complete Setup
Your indicator is now installed and activated! You can now use it on your NinjaTrader charts.